Removing Tar From Car: A Comprehensive Guide to Protecting Your Vehicle’s Paint
Finding tar on your car can be frustrating. Those sticky black spots not only look unsightly but can also damage your car’s paint if left untreated. Fortunately, removing tar from car surfaces is a manageable task with the right tools and techniques. This comprehensive guide will walk you through the process, ensuring you can safely and effectively remove tar and protect your vehicle’s finish.
Understanding Tar and Its Impact on Your Car
Tar is a byproduct of asphalt and coal, often encountered on roads, especially during hot weather or road construction. When driving, especially on freshly paved roads, tar can easily flick up and adhere to your car’s lower panels, wheel wells, and even the rear. The longer tar remains on your car, the harder it becomes to remove, increasing the risk of damage to the paint.
Tar contains harsh chemicals that can break down the clear coat of your car’s paint over time. This can lead to fading, discoloration, and even rust. Therefore, prompt action is crucial when you notice tar on your vehicle. Regular car washing alone won’t remove tar; specialized methods are required to dissolve and lift the tar without harming the underlying paint.
Essential Tools and Materials for Tar Removal
Before you begin, gather the necessary tools and materials. Having everything on hand will make the process smoother and more efficient. Here’s what you’ll need:
- Tar Remover: Choose a dedicated tar remover product specifically designed for automotive use. These products contain solvents that dissolve tar without damaging the paint.
- Microfiber Cloths: Soft microfiber cloths are essential for gentle cleaning and wiping. Avoid using abrasive materials that can scratch the paint.
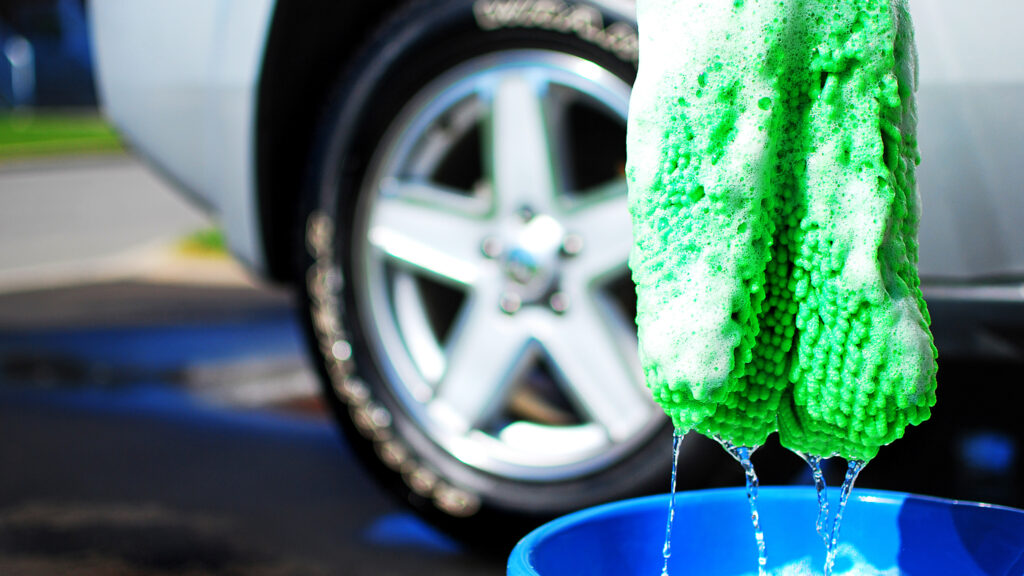
- Wash Mitt: A high-quality wash mitt will help you safely wash the car before and after tar removal.
- Car Wash Soap: Use a pH-balanced car wash soap to clean the vehicle.
- Detailing Clay (Optional): For stubborn tar deposits, detailing clay can be used to lift contaminants safely.
- Clay Lubricant (Optional): If using detailing clay, you’ll need a clay lubricant to prevent scratching.
- Warm Water: A bucket of warm water will be needed for rinsing.
- Spray Bottle: Useful for applying tar remover or clay lubricant.
- Gloves: Protect your hands from the chemicals in tar remover.
Step-by-Step Guide to Removing Tar From Your Car
Step 1: Wash Your Car
Begin by thoroughly washing your car to remove loose dirt and debris. This will prevent you from grinding particles into the paint during the tar removal process. Use a pH-balanced car wash soap and a wash mitt to clean the entire vehicle, paying special attention to areas with tar spots. Rinse the car thoroughly with clean water and dry it with a microfiber cloth.
Step 2: Apply Tar Remover
Apply the tar remover to the affected areas according to the product’s instructions. Most tar removers come in a spray bottle. Spray the product directly onto the tar spots, ensuring they are fully saturated. Allow the tar remover to dwell for the recommended time (usually a few minutes). This dwell time allows the solvents to break down the tar, making it easier to remove. Be sure to read the product label for specific dwell time recommendations and warnings.
Step 3: Gently Wipe Away the Tar
After the dwell time, gently wipe away the dissolved tar with a clean microfiber cloth. Use a light, circular motion to avoid scratching the paint. If the tar is particularly stubborn, you may need to apply more tar remover and allow it to dwell for a longer period. Avoid applying excessive pressure, as this can damage the paint. Replace the microfiber cloth frequently as it becomes saturated with tar to prevent re-depositing the tar onto the car’s surface.
Step 4: Use Detailing Clay (Optional)
For tar that remains after using tar remover, detailing clay can be an effective solution. Spray the area with clay lubricant to provide a smooth surface for the clay to glide over. Gently rub the detailing clay over the tar spots, using light pressure. The clay will lift the remaining tar from the paint. Knead the clay frequently to expose a clean surface and prevent re-depositing contaminants. [See also: Best Car Detailing Clay Bars].
Step 5: Re-Wash the Area
After removing the tar, re-wash the affected area to remove any remaining tar remover or clay lubricant. Use car wash soap and a clean wash mitt to gently clean the area. Rinse thoroughly with clean water and dry with a microfiber cloth. This step is crucial to ensure that no residue from the tar removal process remains on the paint.
Step 6: Inspect and Protect
Inspect the area to ensure all tar has been removed. If necessary, repeat the process. Once you are satisfied, apply a coat of wax or sealant to protect the paint. Wax and sealant create a barrier that helps prevent tar and other contaminants from adhering to the paint in the future. This protective layer also enhances the shine and appearance of your car.
Tips for Preventing Tar Buildup
Prevention is always better than cure. Here are some tips to help prevent tar buildup on your car:
- Avoid Freshly Paved Roads: When possible, avoid driving on roads that have recently been paved or are undergoing road construction.
- Regular Washing: Wash your car regularly to remove dirt and grime that can attract tar.
- Apply Wax or Sealant: Regularly apply wax or sealant to create a protective barrier on your car’s paint.
- Consider Mud Flaps: Mud flaps can help prevent tar and other road debris from splashing onto your car.
- Park Strategically: Avoid parking near construction sites or areas where tar is likely to be present.
Choosing the Right Tar Remover
Selecting the right tar remover is crucial for effectively removing tar without damaging your car’s paint. Here are some factors to consider when choosing a tar remover:
- Read Reviews: Check online reviews to see what other users have to say about the product’s effectiveness and safety.
- Check Ingredients: Look for tar removers that are specifically designed for automotive use and contain ingredients that are safe for paint.
- Test on a Small Area: Before applying the tar remover to the entire affected area, test it on a small, inconspicuous spot to ensure it doesn’t damage the paint.
- Consider the Application Method: Some tar removers come in spray bottles, while others are applied with a cloth. Choose the application method that you find most convenient.
- Price: Tar removers vary in price. Consider your budget and choose a product that offers good value for the money.
Alternative Tar Removal Methods
While dedicated tar removers are the most effective solution, there are some alternative methods you can try if you don’t have access to a commercial product. However, exercise caution when using these methods, as they may not be as safe for your car’s paint:
- WD-40: WD-40 can sometimes dissolve tar, but it’s important to wash the area thoroughly after use to remove any residue.
- Peanut Butter: The oils in peanut butter can help loosen tar. Apply a small amount to the tar spot, let it sit for a few minutes, and then wipe it away.
- Cooking Oil: Similar to peanut butter, cooking oil can help dissolve tar. Apply a small amount to the tar spot, let it sit for a few minutes, and then wipe it away.
These alternative methods should be used with caution and tested on a small, inconspicuous area first to ensure they don’t damage the paint. Always wash the area thoroughly after using these methods to remove any residue.
The Importance of Protecting Your Car’s Paint
Your car’s paint is not just for aesthetics; it also protects the underlying metal from rust and corrosion. Maintaining your car’s paint is essential for preserving its value and appearance. Removing tar promptly and effectively is a crucial part of this maintenance. By following the steps outlined in this guide, you can safely remove tar from your car and protect its paint for years to come. Remember, regular maintenance and preventative measures are key to keeping your car looking its best. Addressing tar spots quickly prevents long-term damage and keeps your vehicle looking well-maintained. Regularly inspecting your car, especially after driving on freshly paved roads, can help you identify and address tar spots before they become a major problem. The process of removing tar from car surfaces can be time-consuming, but the results are well worth the effort. A clean, well-maintained car not only looks better but also retains its value longer. The importance of removing tar from car surfaces cannot be overstated, as it directly impacts the longevity and appearance of your vehicle. The best way to keep your car looking pristine is by removing tar from car promptly when it appears. Many car owners find removing tar from car to be a daunting task, but with the right tools and techniques, it can be easily managed. The key to successfully removing tar from car is to act quickly and use the appropriate products. Ignoring tar spots can lead to more significant paint damage, making the process of removing tar from car more difficult in the future. When removing tar from car, always use gentle methods to avoid scratching or damaging the paint. Investing in quality products for removing tar from car will pay off in the long run by protecting your vehicle’s finish. Many car enthusiasts swear by specific brands for removing tar from car due to their effectiveness and safety. The process of removing tar from car is an essential part of car maintenance that should not be overlooked. Regular attention to detail, including removing tar from car, will keep your vehicle looking its best. Don’t underestimate the impact of removing tar from car on the overall appearance and value of your vehicle. The effort you put into removing tar from car will be rewarded with a beautiful, well-maintained vehicle. It’s important to be patient when removing tar from car, as rushing the process can lead to mistakes and potential damage. Remember, removing tar from car is an investment in the long-term health and appearance of your vehicle. The satisfaction of removing tar from car and seeing your vehicle’s paint restored is well worth the effort. By following these guidelines for removing tar from car, you can ensure your vehicle remains in top condition.
Conclusion
Removing tar from your car is a necessary task to maintain its appearance and protect its paint. By following the steps outlined in this guide and using the right tools and materials, you can safely and effectively remove tar and keep your car looking its best. Remember to act promptly, use gentle methods, and protect your car’s paint with wax or sealant after tar removal. With a little effort and attention, you can keep your car looking pristine and well-maintained.
