How Do I Remove Old Silicone Sealant: A Comprehensive Guide
Silicone sealant is a versatile material used in various applications, from sealing bathtubs and showers to weatherproofing windows and doors. Over time, silicone sealant can degrade, crack, or become discolored, making it necessary to remove and replace it. Knowing how do I remove old silicone sealant properly is crucial to ensure a clean surface for applying new sealant and preventing potential water damage or mold growth. This comprehensive guide will walk you through the necessary steps, tools, and techniques to effectively remove old silicone sealant.
Understanding Silicone Sealant and Its Degradation
Silicone sealant is a synthetic polymer known for its flexibility, water resistance, and durability. It forms a strong bond with various surfaces, making it ideal for sealing gaps and joints. However, exposure to moisture, UV radiation, and temperature fluctuations can cause silicone sealant to deteriorate over time. Signs of degradation include:
- Cracking and peeling
- Discoloration (yellowing or blackening)
- Loss of adhesion
- Mold or mildew growth
When these signs appear, it’s time to consider removing and replacing the old silicone sealant. Ignoring these issues can lead to water leaks, structural damage, and health problems related to mold and mildew.
Tools and Materials Needed for Removing Old Silicone Sealant
Before you start, gather the necessary tools and materials to make the removal process efficient and safe. Here’s a list of essentials:
- Utility Knife or Razor Blade Scraper: For cutting and scraping away the bulk of the sealant.
- Silicone Sealant Removal Tool: A specialized tool designed to remove sealant without damaging the underlying surface.
- Heat Gun or Hair Dryer: To soften the sealant, making it easier to remove.
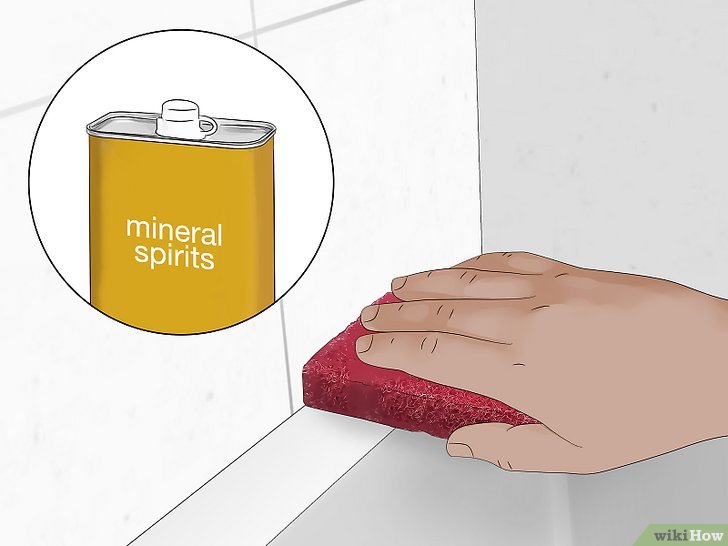
- Mineral Spirits or Silicone Sealant Remover: To dissolve any remaining residue.
- Scrub Brush or Abrasive Pad: For scrubbing away stubborn residue.
- Clean Cloths or Paper Towels: For wiping surfaces and cleaning up.
- Safety Glasses and Gloves: To protect your eyes and skin from debris and chemicals.
Having these tools on hand will streamline the removal process and ensure a professional-looking result. If you’re asking yourself, “how do I remove old silicone sealant with minimal effort?” having the right tools is half the battle.
Step-by-Step Guide: Removing Old Silicone Sealant
Step 1: Preparation and Safety Measures
Before you begin, ensure the work area is well-ventilated. Open windows or use a fan to circulate air. Put on your safety glasses and gloves to protect yourself from debris and chemicals. Cover any nearby surfaces with drop cloths or plastic sheeting to prevent damage.
Step 2: Softening the Sealant
Softening the sealant makes it easier to remove. Use a heat gun or hair dryer to gently heat the silicone sealant for a few minutes. Keep the heat source moving to avoid overheating the surface. The heat will soften the sealant, making it more pliable and easier to cut or scrape away.
Step 3: Cutting the Sealant
Using a utility knife or razor blade scraper, carefully cut along the edges of the silicone sealant. Make shallow cuts to avoid damaging the underlying surface. The goal is to separate the sealant from the surface it’s bonded to. Be patient and take your time to ensure clean cuts. This step is crucial for anyone wondering, “how do I remove old silicone sealant cleanly?”
Step 4: Removing the Bulk of the Sealant
Once you’ve cut along the edges, use a silicone sealant removal tool or the utility knife to start peeling away the bulk of the sealant. Insert the tool or knife under the edge of the sealant and gently lift and pull. Work your way along the length of the sealant, removing as much as possible in strips or chunks. Avoid using excessive force, as this can damage the surface beneath.
Step 5: Removing Remaining Residue
After removing the bulk of the sealant, you’ll likely be left with some residue. Apply mineral spirits or a silicone sealant remover to the remaining residue. Let it sit for a few minutes to soften the residue. Then, use a scrub brush or abrasive pad to scrub away the residue. Wipe the surface clean with a cloth or paper towel.
Step 6: Final Cleaning and Inspection
Once you’ve removed all the residue, clean the surface thoroughly with soap and water. Rinse and dry the surface completely. Inspect the area for any remaining sealant or damage. If necessary, repeat the cleaning process. A clean, dry surface is essential for proper adhesion of the new silicone sealant.
Alternative Methods for Removing Old Silicone Sealant
While the above method is effective, there are alternative approaches you can try:
- Using WD-40: WD-40 can help loosen the bond of the silicone sealant. Spray WD-40 on the sealant and let it sit for a few minutes before attempting to remove it.
- Baking Soda Paste: Make a paste of baking soda and water and apply it to the sealant. Let it sit for a few hours or overnight before scrubbing it away.
- Vinegar: Vinegar can also help soften the sealant. Soak a cloth in vinegar and apply it to the sealant for a few hours before attempting to remove it.
These methods may be less effective than using specialized tools and chemicals, but they can be useful for small areas or when you don’t have access to other supplies.
Preventing Future Silicone Sealant Problems
To prevent future problems with silicone sealant, consider the following tips:
- Choose High-Quality Sealant: Invest in a high-quality silicone sealant that is specifically designed for the application.
- Proper Application: Apply the sealant correctly, following the manufacturer’s instructions. Ensure the surface is clean and dry before applying the sealant.
- Regular Maintenance: Inspect the sealant regularly for signs of degradation. Address any issues promptly to prevent further damage.
- Ventilation: Ensure proper ventilation in areas where silicone sealant is used, such as bathrooms and kitchens. This helps prevent mold and mildew growth.
Common Mistakes to Avoid When Removing Silicone Sealant
Removing old silicone sealant can be tricky, and it’s easy to make mistakes that can damage the surface or make the process more difficult. Here are some common mistakes to avoid:
- Using Excessive Force: Avoid using excessive force when cutting or scraping the sealant. This can damage the underlying surface.
- Using the Wrong Tools: Using the wrong tools can make the process more difficult and increase the risk of damage. Use specialized tools designed for removing silicone sealant.
- Not Softening the Sealant: Failing to soften the sealant before attempting to remove it can make the process much more difficult. Use a heat gun or hair dryer to soften the sealant.
- Not Cleaning the Surface Properly: Failing to clean the surface properly after removing the sealant can prevent the new sealant from adhering properly.
When to Call a Professional
While removing old silicone sealant is a DIY project for many homeowners, there are situations where it’s best to call a professional. Consider hiring a professional if:
- You’re not comfortable working with tools or chemicals.
- The sealant is in a difficult-to-reach area.
- The sealant is heavily damaged or moldy.
- You’re concerned about damaging the underlying surface.
A professional will have the experience and expertise to remove the sealant safely and efficiently, ensuring a professional-looking result.
Conclusion
Removing old silicone sealant is a necessary task for maintaining the integrity and appearance of your home. By following this comprehensive guide, you can effectively remove old silicone sealant and prepare the surface for new sealant. Remember to use the right tools, take safety precautions, and be patient throughout the process. With a little effort, you can achieve a clean, professional-looking result. Knowing how do I remove old silicone sealant is a valuable skill for any homeowner, saving time and money on potential repairs.
So, the next time you find yourself wondering, “how do I remove old silicone sealant?” refer back to this guide for a step-by-step approach that will help you tackle the task with confidence. Remember to prioritize safety and take your time to ensure a successful outcome. Good luck!
[See also: How to Apply Silicone Sealant Like a Pro]
[See also: Best Silicone Sealants for Bathrooms]
[See also: Troubleshooting Common Sealant Problems]
