How to Remove Tar from Paint on Car: A Comprehensive Guide
Discovering tar on your car’s paint can be frustrating. Not only does it detract from your vehicle’s appearance, but if left untreated, it can also damage the paint over time. This guide provides a comprehensive overview of how to safely and effectively remove tar from paint on car, ensuring your vehicle maintains its pristine condition. We’ll cover everything from identifying tar spots to the best products and techniques for their removal. Learn how to remove tar from paint on car like a professional detailer.
Understanding Tar and Its Impact on Car Paint
Tar is a sticky, dark-colored substance that’s a byproduct of coal or wood distillation. On roads, it originates from asphalt, which is used in road construction and repair. When driving, especially on freshly paved roads, tar can easily flick up and adhere to your car’s exterior, particularly the lower panels and wheel wells. Understanding the composition of tar helps in selecting the appropriate removal methods.
The impact of tar on car paint is twofold. First, it’s unsightly. Second, and more importantly, tar contains chemicals that can react with and degrade the clear coat and underlying paint layers. Prolonged exposure to tar can lead to discoloration, etching, and even paint chipping. Therefore, prompt and effective tar removal from car paint is crucial.
Identifying Tar Spots on Your Car
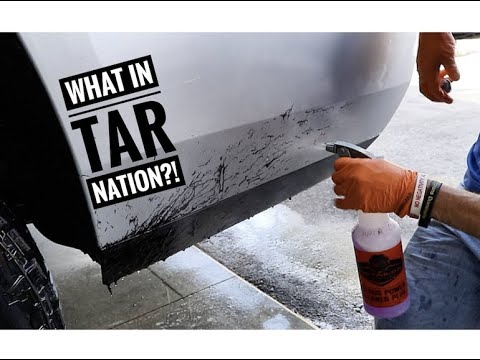
Tar spots typically appear as small, black or dark brown specks or smears on your car’s paint. They are most commonly found on the lower panels, behind the wheels, and around the rocker panels. Because tar is dark, it’s usually more noticeable on lighter-colored vehicles. However, even on darker cars, you can identify tar by its raised texture and distinct appearance compared to regular dirt or grime.
Regularly inspecting your car, especially after driving on newly paved roads or in construction zones, will help you identify tar spots early. The sooner you spot them, the easier they will be to remove tar from paint on car. Ignoring these spots can lead to more stubborn stains that require more aggressive removal techniques.
Essential Tools and Products for Tar Removal
Before you begin the tar removal from car paint process, gather the necessary tools and products. Having the right equipment will make the job easier and safer for your car’s finish. Here’s a list of essential items:
- Tar Remover: Choose a dedicated tar remover specifically designed for automotive use. These products contain solvents that dissolve tar without damaging the paint.
- Microfiber Towels: Soft, clean microfiber towels are essential for wiping away the tar remover and loosened tar. Avoid using abrasive cloths that can scratch the paint.
- Wash Mitt: A high-quality wash mitt is needed for washing the car before and after tar removal.
- Car Wash Soap: Use a pH-neutral car wash soap to clean the vehicle without stripping away wax or sealants.
- Spray Bottle (Optional): If your tar remover doesn’t come with a spray nozzle, a spray bottle can help you apply it evenly.
- Clay Bar (Optional): For stubborn tar spots, a clay bar can be used to gently lift the remaining residue.
- Detailing Brush (Optional): A soft-bristled detailing brush can help loosen tar from hard-to-reach areas.
When selecting a tar remover, read the product label carefully and choose one that is safe for your car’s paint. Test the product on an inconspicuous area first to ensure it doesn’t cause any discoloration or damage. Always prioritize products specifically formulated to remove tar from paint on car.
Step-by-Step Guide to Removing Tar from Your Car’s Paint
Follow these steps to safely and effectively remove tar from paint on car:
- Wash the Car: Begin by washing your car thoroughly with car wash soap and water. This will remove any loose dirt and debris, allowing you to better see the tar spots and prevent scratching during the removal process.
- Apply Tar Remover: Spray the tar remover directly onto the tar spots. Allow the product to dwell for the recommended time specified on the label. This usually ranges from 1 to 5 minutes. Do not let the tar remover dry on the paint.
- Wipe Away the Tar: Using a clean microfiber towel, gently wipe away the loosened tar. Use a circular motion and apply light pressure. If the tar is particularly stubborn, you may need to repeat the application and wiping process.
- Rinse the Area: Once you’ve removed the tar, rinse the area with clean water to remove any remaining tar remover residue.
- Inspect and Repeat if Necessary: Inspect the area to ensure all the tar has been removed. If any tar remains, repeat steps 2-4.
- Wash the Car Again: After removing all the tar, wash the car again to remove any residual tar remover and ensure a clean surface.
- Dry the Car: Dry the car with a clean microfiber towel to prevent water spots.
- Apply Wax or Sealant: To protect the paint and restore its shine, apply a coat of wax or sealant to the area where you removed the tar. This will also help prevent future tar buildup.
Remember to always work in a well-ventilated area and wear gloves to protect your hands from the chemicals in the tar remover. Following these steps carefully will help you remove tar from paint on car without damaging the finish.
Alternative Methods for Tar Removal
While dedicated tar removers are the most effective solution, there are alternative methods you can use to remove tar from paint on car if you don’t have access to these products. However, use these methods with caution, as some may be more abrasive than others.
- Clay Bar: A clay bar is a detailing tool that can gently lift contaminants, including tar, from the paint surface. Lubricate the area with detailing spray and gently rub the clay bar over the tar spots.
- WD-40: WD-40 is a multi-purpose lubricant that can also dissolve tar. Spray WD-40 onto the tar spots, let it dwell for a few minutes, and then wipe away with a microfiber towel. Be sure to wash the area thoroughly afterward to remove any WD-40 residue.
- Peanut Butter: Believe it or not, the oils in peanut butter can help dissolve tar. Apply a small amount of peanut butter to the tar spots, let it sit for a few minutes, and then wipe away with a microfiber towel. Wash the area thoroughly afterward to remove any peanut butter residue.
When using alternative methods, always test them on an inconspicuous area first to ensure they don’t damage the paint. Start with the least abrasive method and gradually move to more aggressive techniques if necessary. Always prioritize safety and avoid using harsh chemicals or abrasive materials that can scratch or damage your car’s finish. These alternative methods can help you remove tar from paint on car in a pinch, but professional tar removers are generally the best option.
Preventing Tar Buildup on Your Car
Prevention is always better than cure. Here are some tips to help prevent tar buildup on your car:
- Avoid Driving on Freshly Paved Roads: If possible, avoid driving on roads that have recently been paved or repaired. These roads are more likely to have loose tar that can flick up and stick to your car.
- Maintain a Good Coat of Wax or Sealant: A good coat of wax or sealant will protect your car’s paint and make it easier to remove tar if it does accumulate. Reapply wax or sealant every few months to maintain a protective barrier.
- Wash Your Car Regularly: Regular washing will remove dirt and grime that can attract tar. It will also allow you to spot tar spots early, before they become more difficult to remove.
- Consider Mud Flaps: Mud flaps can help protect your car’s lower panels from tar and other road debris.
By following these preventive measures, you can minimize the risk of tar buildup and keep your car looking its best. Taking proactive steps to protect your car will save you time and effort in the long run, and ensure you rarely have to actively remove tar from paint on car.
When to Seek Professional Help
In some cases, tar spots may be too stubborn or widespread to remove yourself. If you’ve tried the methods outlined above and are still struggling to remove tar from paint on car, it may be time to seek professional help. A professional detailer has the experience, tools, and products to safely and effectively remove tar without damaging your car’s paint. They can also assess the condition of your paint and recommend any necessary repairs or treatments.
Additionally, if you notice any damage to your car’s paint after removing tar, such as discoloration, etching, or chipping, it’s important to consult with a professional. They can provide expert advice and perform any necessary repairs to restore your car’s finish. Knowing when to seek professional help will ensure that you remove tar from paint on car properly and maintain the value and appearance of your vehicle.
Conclusion
Removing tar from your car’s paint is an essential part of maintaining its appearance and protecting its finish. By following the steps and tips outlined in this guide, you can safely and effectively remove tar from paint on car and keep your vehicle looking its best. Remember to use the right tools and products, work carefully, and take preventive measures to minimize tar buildup. With a little effort and attention, you can keep your car looking showroom-ready for years to come.
Whether you’re dealing with a few small tar spots or a more extensive buildup, this guide provides the information you need to tackle the problem with confidence. So, grab your tar remover, microfiber towels, and let’s get to work! Keep this guide handy, and you’ll always know how to remove tar from paint on car.
[See also: Best Car Waxes for Paint Protection]
[See also: How to Detail Your Car Like a Pro]
[See also: Understanding Car Paint Correction]
