How Do You Make a Carved Pumpkin Last Longer? Expert Tips and Tricks
The jack-o’-lantern is a quintessential symbol of Halloween, a grinning (or ghoulish) face peering out from porches and windowsills. But the festive fun can quickly fade as carved pumpkins are prone to decay. Knowing how do you make a carved pumpkin last longer is crucial to enjoying your spooky creation throughout the Halloween season. This article dives into expert-backed methods for extending the lifespan of your carved pumpkins, ensuring your artistry withstands the test of time (and weather).
Choosing the Right Pumpkin
The longevity of your jack-o’-lantern starts even before you begin carving. Selecting the right pumpkin is paramount. Look for pumpkins that are:
- Healthy and Blemish-Free: Avoid pumpkins with soft spots, bruises, or cuts. These are entry points for bacteria and fungi, accelerating decay.
- Firm and Heavy: A heavy pumpkin for its size indicates a thick wall, which provides better insulation and resistance to rot.
- Strong Stem: A sturdy, intact stem is essential. Avoid pumpkins where the stem is loose or broken, as this can also lead to quicker deterioration.
Preparing the Pumpkin Before Carving
Proper preparation can significantly impact how long your carved pumpkin lasts. Start by thoroughly cleaning the exterior. Use a solution of:
- Bleach and Water: Mix 1 tablespoon of bleach per gallon of water. Wipe down the entire pumpkin surface with this solution to kill surface bacteria and mold spores.
- Vinegar and Water: Alternatively, a mixture of equal parts white vinegar and water can be used. Vinegar is a natural disinfectant and can help prevent mold growth.
Allow the pumpkin to dry completely before carving. This will help prevent moisture buildup, which encourages decay.
Carving Techniques for Extended Life
The carving process itself can influence how you make a carved pumpkin last longer. Consider these techniques:
- Keep it Simple: Intricate designs may look impressive, but they expose more surface area to the elements, increasing the risk of dehydration and rot. Simpler designs with fewer cuts are less prone to collapsing and decaying quickly.
- Use the Right Tools: Invest in pumpkin carving tools designed for the job. These tools provide cleaner cuts, minimizing damage to the pumpkin’s flesh.
- Cut at an Angle: When carving, angle the cuts outward slightly. This allows for better air circulation and prevents moisture from trapping inside the pumpkin.
Preservation Methods: Keeping Your Pumpkin Fresh
Several preservation methods can help extend the life of your carved pumpkin. These methods focus on preventing dehydration and combating microbial growth.
Applying Sealants
Sealants create a barrier against moisture loss and prevent bacteria from entering the pumpkin. Consider these options:
- Petroleum Jelly: Apply a thin layer of petroleum jelly to all cut surfaces. This creates a waterproof barrier, preventing dehydration.
- Acrylic Spray: Spraying the inside and outside of the carved pumpkin with a clear acrylic sealant can also help prevent moisture loss. Ensure you use a sealant that is safe for use on food surfaces, even though you won’t be eating the pumpkin.
- Pumpkin Preservative Sprays: Commercial pumpkin preservative sprays are available. These sprays typically contain fungicides and antibacterial agents to inhibit microbial growth. Follow the manufacturer’s instructions for application.
Hydrating the Pumpkin
Pumpkins are mostly water, so preventing dehydration is key. Here are some hydrating techniques:
- Soaking: Submerge the carved pumpkin in a bucket of water (or a large tub) for several hours every few days. This rehydrates the pumpkin’s flesh, preventing it from shriveling and collapsing. Adding a small amount of bleach to the water (1 tablespoon per gallon) can help prevent bacterial growth.
- Spraying: Regularly spray the inside and outside of the carved pumpkin with water. This helps maintain moisture levels and prevents the pumpkin from drying out.
Using Desiccants
Desiccants absorb moisture from the surrounding environment, preventing mold and mildew growth. Place desiccants inside the carved pumpkin to keep it dry.
- Silica Gel Packets: These packets are commonly found in packaging to prevent moisture damage. Place several silica gel packets inside the pumpkin to absorb excess moisture.
- Calcium Chloride: Calcium chloride is a powerful desiccant commonly used in dehumidifiers. Place a small container of calcium chloride inside the pumpkin to absorb moisture. Be careful when handling calcium chloride, as it can be irritating to the skin.
Environmental Factors and Storage
External conditions play a significant role in how long a carved pumpkin will last. Consider these environmental factors:
- Temperature: Cool temperatures are ideal for preserving carved pumpkins. Avoid placing them in direct sunlight or near heat sources, as this will accelerate decay.
- Humidity: High humidity promotes mold and mildew growth. Ensure the pumpkin is well-ventilated to prevent moisture buildup.
- Pests: Protect your carved pumpkin from pests such as squirrels, rodents, and insects. These pests can damage the pumpkin and introduce bacteria.
When not displaying the pumpkin, store it in a cool, dry place, such as a garage or basement. Wrap it in plastic wrap to prevent dehydration.
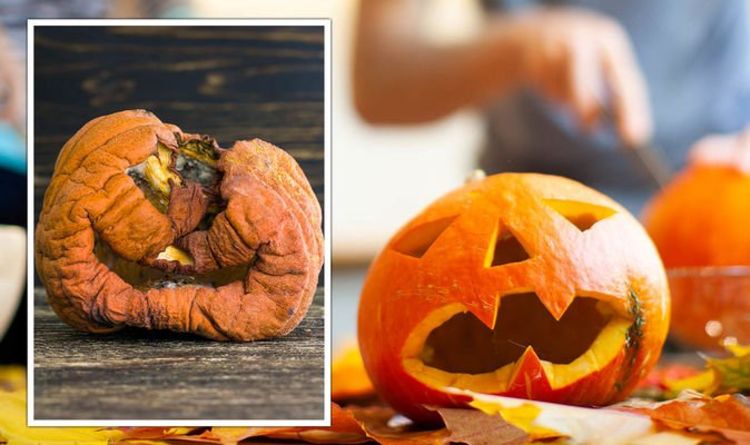
Dealing with Mold and Rot
Even with the best preservation efforts, mold and rot may still occur. Address these issues promptly to prevent further damage.
- Remove Mold: If you notice mold growth, wipe it away with a solution of bleach and water (1 tablespoon of bleach per gallon of water). Be sure to wear gloves and avoid inhaling the fumes.
- Trim Rotting Areas: If a portion of the pumpkin begins to rot, carefully trim away the affected area with a sharp knife. Seal the cut edges with petroleum jelly or acrylic spray.
Alternative Methods and Considerations
Beyond the traditional methods, several alternative approaches can help extend the life of your carved pumpkin:
- Artificial Pumpkins: For a long-lasting option, consider using artificial pumpkins. These can be carved and decorated just like real pumpkins and will last for many years.
- Painting Instead of Carving: Instead of carving, try painting your pumpkin. This prevents the pumpkin from being exposed to the elements and reduces the risk of decay.
- LED Lighting: Use LED lights instead of traditional candles to illuminate your jack-o’-lantern. LED lights generate less heat, which can help prevent the pumpkin from drying out.
Troubleshooting Common Problems
Even with careful planning and execution, you might encounter some common problems with your carved pumpkin. Here’s how to troubleshoot them:
- Pumpkin is Shriveling: This indicates dehydration. Soak the pumpkin in water to rehydrate it.
- Pumpkin is Collapsing: This often happens when the pumpkin is too dry or has too many intricate cuts. Try supporting the pumpkin from the inside with skewers or toothpicks.
- Pumpkin is Attracting Pests: Use pest repellents or traps to keep pests away from your carved pumpkin.
Conclusion: Enjoying Your Carved Pumpkin Longer
Knowing how do you make a carved pumpkin last longer involves a combination of proper preparation, preservation techniques, and environmental control. By selecting a healthy pumpkin, cleaning it thoroughly, employing effective preservation methods, and protecting it from the elements, you can extend the lifespan of your jack-o’-lantern and enjoy its spooky charm throughout the Halloween season. Experiment with different techniques to find what works best for your environment and carving style. Happy Halloween! [See also: Creative Pumpkin Carving Ideas] [See also: Best LED Lights for Jack-o’-Lanterns]
