How to Remove Caulk Residue: A Comprehensive Guide
Caulk is a versatile sealant used in various applications, from bathrooms and kitchens to windows and siding. However, over time, caulk can deteriorate, crack, or become unsightly. When it’s time to replace old caulk, removing the existing caulk and, more importantly, the stubborn caulk residue can be a challenging task. This comprehensive guide will walk you through the necessary steps and techniques to effectively remove caulk residue, ensuring a clean surface for applying fresh caulk. Mastering the art of remove caulk residue is crucial for a professional-looking finish and long-lasting seal. We’ll explore different methods, tools, and cleaning solutions to tackle even the most persistent caulk residue. Let’s dive in!
Understanding Caulk and Its Residue
Before we delve into the removal process, it’s essential to understand the nature of caulk and why it leaves behind residue. Caulk is typically composed of silicone, acrylic latex, or polyurethane. These materials are designed to be flexible and waterproof, but they can also bond strongly to surfaces. When caulk is removed, a thin layer of residue often remains due to this strong adhesion. This caulk residue can be difficult to remove because it’s both sticky and resistant to many common cleaning agents. Ignoring this residue can prevent the new caulk from adhering properly, leading to leaks and premature failure.
Tools and Materials Needed
To effectively remove caulk residue, you’ll need to gather the following tools and materials:
- Utility knife or caulk removal tool
- Plastic scraper or putty knife
- Soft cloths or sponges
- White vinegar or rubbing alcohol
- Baking soda
- WD-40 (optional)
- Heat gun or hairdryer (optional)
- Protective gloves
- Safety glasses
Step-by-Step Guide to Removing Caulk Residue
Follow these steps to effectively remove caulk residue and prepare the surface for new caulk:
Step 1: Soften the Residue
The first step is to soften the caulk residue to make it easier to remove. You can use heat or a solvent for this purpose.
Using Heat
A heat gun or hairdryer can be used to soften the caulk residue. Hold the heat source a few inches away from the residue and move it back and forth to avoid overheating the surface. The heat will soften the caulk, making it easier to scrape away.
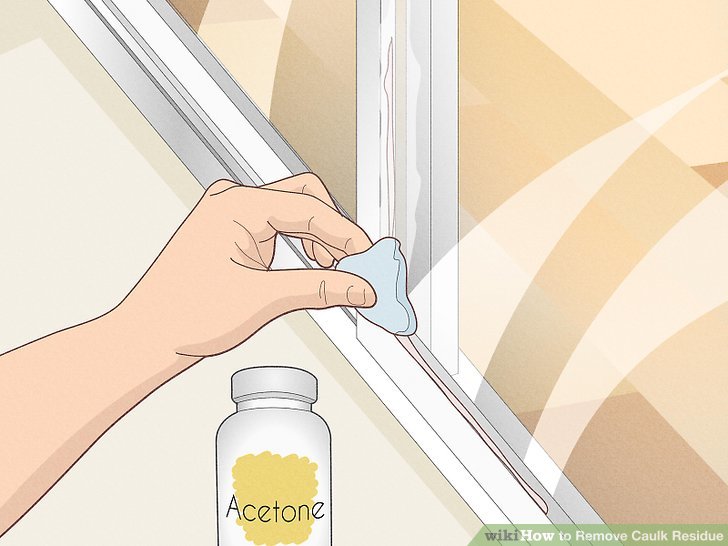
Using Solvents
White vinegar, rubbing alcohol, or WD-40 can be used as solvents to soften the caulk residue. Apply the solvent to the residue and let it sit for 15-20 minutes. This will help break down the caulk’s adhesive properties, making it easier to remove.
Step 2: Scraping the Residue
Once the caulk residue has been softened, use a plastic scraper or putty knife to carefully scrape it away. Avoid using metal tools, as they can scratch the underlying surface. Hold the scraper at a shallow angle and apply gentle pressure to lift the residue. Work in small sections and repeat the softening process if necessary. It is important to completely remove caulk residue for best results.
Step 3: Cleaning the Surface
After scraping away the majority of the caulk residue, you’ll need to clean the surface to remove any remaining traces. Mix baking soda with a small amount of water to create a paste. Apply the paste to the affected area and scrub gently with a soft cloth or sponge. The baking soda will act as a mild abrasive to remove stubborn residue without damaging the surface. Rinse the area with clean water and dry thoroughly.
Step 4: Final Inspection
Once the surface is clean and dry, inspect it carefully to ensure that all caulk residue has been removed. If you find any remaining residue, repeat the softening and scraping process. It’s crucial to have a completely clean surface before applying new caulk to ensure a strong and long-lasting seal.
Alternative Methods for Removing Caulk Residue
In addition to the step-by-step guide, here are some alternative methods you can try to remove caulk residue:
Using a Commercial Caulk Remover
Commercial caulk removers are specifically designed to break down caulk and make it easier to remove. These products typically contain solvents that dissolve the caulk’s adhesive properties. Follow the manufacturer’s instructions carefully when using a commercial caulk remover, and always wear protective gloves and safety glasses.
Using a Razor Blade Scraper
A razor blade scraper can be effective for removing stubborn caulk residue, but it should be used with caution. Hold the scraper at a shallow angle and apply gentle pressure to avoid scratching the surface. This method is best suited for smooth, non-porous surfaces like tile or glass. If you’re struggling to remove caulk residue, a razor blade scraper might be your best bet.
Using a Steam Cleaner
A steam cleaner can be used to soften and loosen caulk residue. The steam will penetrate the caulk, breaking down its adhesive properties and making it easier to scrape away. This method is particularly effective for removing caulk from grout lines and other hard-to-reach areas.
Preventing Caulk Residue in the Future
While removing caulk residue can be a tedious task, there are steps you can take to prevent it from occurring in the first place:
- Use high-quality caulk: High-quality caulk is less likely to leave behind residue when removed.
- Apply caulk properly: Applying caulk in a thin, even layer can make it easier to remove in the future.
- Remove old caulk promptly: The longer caulk remains in place, the more difficult it will be to remove and the more likely it is to leave behind residue.
- Use a caulk removal tool: A caulk removal tool is specifically designed to remove caulk without leaving behind residue.
Choosing the Right Caulk for Your Project
Selecting the appropriate caulk for your project is crucial for achieving a long-lasting and effective seal. Different types of caulk are formulated for specific applications and environments. Here’s a brief overview of common caulk types:
- Silicone Caulk: Known for its excellent water resistance and flexibility, silicone caulk is ideal for bathrooms, kitchens, and other areas exposed to moisture. It’s also resistant to mold and mildew growth.
- Acrylic Latex Caulk: This type of caulk is paintable and easy to apply. It’s suitable for interior applications, such as sealing around windows and doors.
- Polyurethane Caulk: Polyurethane caulk offers superior adhesion and durability, making it a good choice for exterior applications and high-traffic areas.
Consider the specific requirements of your project when choosing caulk, including the level of moisture exposure, temperature fluctuations, and the type of surface you’ll be sealing.
Safety Precautions
When working with caulk and solvents, it’s essential to take the following safety precautions:
- Wear protective gloves to prevent skin irritation.
- Wear safety glasses to protect your eyes from splashes.
- Work in a well-ventilated area to avoid inhaling harmful fumes.
- Follow the manufacturer’s instructions for all products used.
Conclusion
Removing caulk residue can be a challenging but necessary task when replacing old caulk. By following the steps and techniques outlined in this guide, you can effectively remove caulk residue and prepare the surface for a fresh application. Remember to soften the residue, scrape it away carefully, clean the surface thoroughly, and take the necessary safety precautions. With the right tools and techniques, you can achieve a professional-looking finish and ensure a long-lasting seal. The importance of completely remove caulk residue cannot be overstated. Good luck! [See also: How to Apply Caulk Like a Pro] [See also: Best Types of Caulk for Bathrooms] [See also: Preventing Mold Growth in Caulk]
